Brakes are an essential part of your bike that ensures that you always have a safe ride. That is why you must take care of them regularly, regular maintenance of the bike will surely add more years to its lifespan.
Adjusting and tightening brakes is easy if you are considerate about some steps. There are mainly two parts of a bike’s brake that need tightening, those are:
- Brake Pads
- Brake Cables
Trust me, you don’t want to experience worn-down brake pads or loose brake cables. Just Make sure that the brake cable outward is locked out of assembly while the adjustments are being made. Even if you have other problems then you can easily adjust bike brakes rubbing against each other.
Important Bike Parts For Bike Brake Alignment
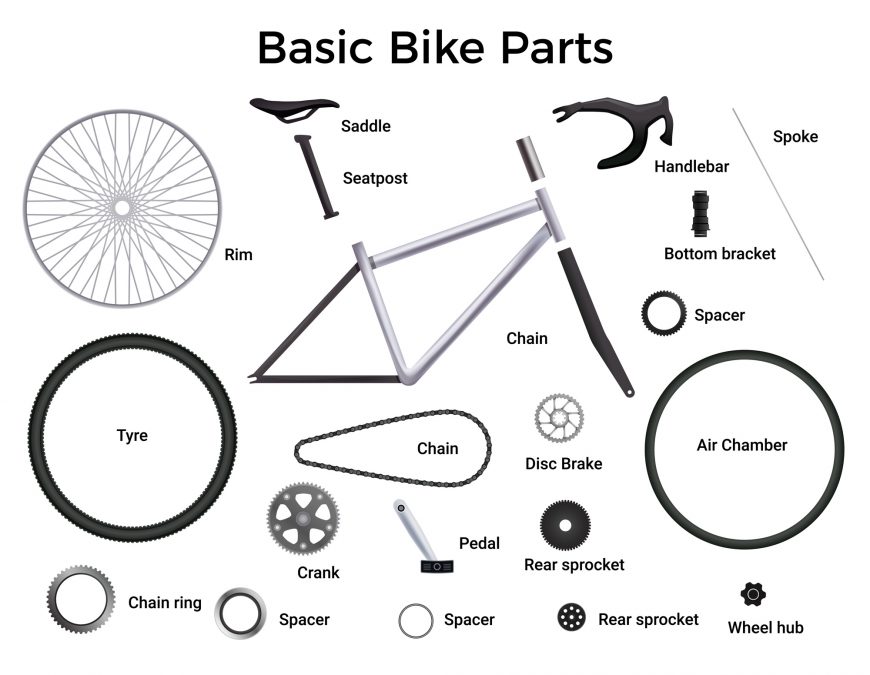
Before we begin, you must know about the different bike parts we will work with.
- Pull Lever: These levers are necessary to operate the brake
- Brake Cable: These cables will connect the pull lever with the brake calipers
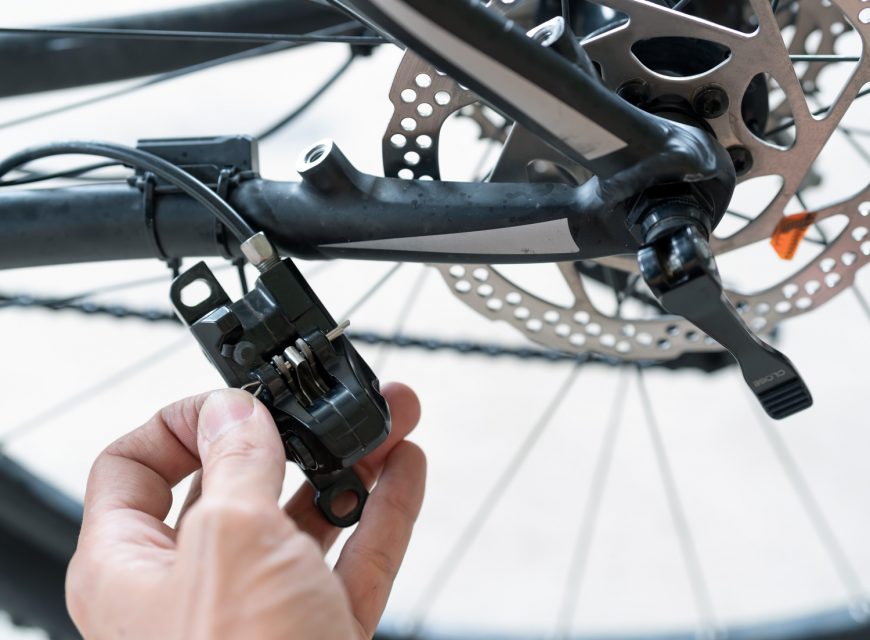
- Brake Caliper: Used to squeeze the brake pads
- Cable Housing: Used to connect the pull lever with the brake calipers
- Cable Length Setting: These are nuts or screws that are used to attach the brake cables to the calipers
- Lock Nut: This is a nut or screw that locks the adjusting knob in place
- Adjusting Knob: Used to adjust the length of the cable housing
How To Align The Bike Brakes
A normal alignment of brakes costs around $20 at my local bike shop. No kidding. So you’d be saving a lot of money if you follow these steps rightly. To start, the brake lever must be in a resting position. Make sure that the rear wheel is also in a steady position.
1. Adjusting The Housing’s Length
Some people start with adjusting the brake cable’s length along with some minor brake cable adjustments, although I won’t be doing that first. I will be adjusting the housing length, when the housing becomes longer, the brake cable will become comparatively shorter and that is our prime goal here.
You can do this in a variety of ways. You can tighten the bike brakes to such an extent that they can fully be engaged even when the brake levers are in a resting position. Brakes should be in a balanced position, they should be a bit loosened up but when being used should feel quick and grippy.
This method works amazingly because you won’t have to make small adjustments now and then. Just make sure that the brake cable tension is just the way it should be.
2. Releasing The Lock Nut Afterwards
Lock Nuts are there to keep the adjustment knobs in their place and they can be found next to the brake levers. You have to unscrew it as far as it goes and then release it.
3. Clamping The Calipers
The next step involves the caliper and brake pads. You need to start by grabbing the brake calipers and squeezing them inwards. They need to be inwards so that the brake pads come onto the wheel rims.
This whole process can be made a whole lot easier if you have a buddy with you, they can hold down the calipers while you do the adjustments.
4. Releasing The Adjustment Knob
In the next step, we have to release the adjustment knob. Start by turning the knob anti-clockwise, keep on turning until the knob can be disengaged from the brake pull assembly. This move will stretch the cable housing exactly where it should be. Also, try pulling the brakes, if there are where you like them to be when everything is going great!
If not then you can do the following:
- If the brakes engage sooner than you want them to, then apply some pressure on the brake lever and screw the adjustment knob back where it was. When the knob is at the correct position then you can stop screwing.
- If this move still doesn’t work, and the brakes still can’t be engaged then use this method. The bike brake cables are the culprits here, either they could be damaged or they could be longer than planned. Start by unscrewing the cable length setting, and pulling the cable to the length that you want.
- If you don’t want to do this much work then you can always take the bike to a bike shop and ask them to give you a brand new brake cable.
5. Finalize By Screwing The Locking Nut Back Into Place
Now that you have made all the necessary adjustments and the brake lever is working how you wanted, it is time to screw the lock nut back, you do this by turning the nut anti-clockwise. Test the brakes by pulling them, you can also have a test ride at this time, they should be working exactly how you wanted!
How To Tighten The Bike Brakes
Tightening the brakes is fairly easy.
1. Start by Loosening The Barrel Adjuster
You have to start with the barrel adjuster first, it is located between the intersection of the brake cable and lever. Now, you have to slowly turn the barrel adjuster clockwise, this will loosen it. Once you do that, the brake cable automatically tightens. If additional problems exist then you would also have to take care of the brake pad bolts.
Mostly all the problems are fixed by loosening the barrel adjuster, but there are other measures that you can take if that does not work out. You can check the state of the brake cable by pressing the lever, and seeing how much it comes close to the handlebar. There are other steps that you can pursue if the cable is still loose.
2. Adjust The Caliper Part of The Brakes Now
Caliper is that part of the brake where the pads are attached and you need to check their state now. There should be a bolt that holds the brake cable to the caliper, find it. You will need an Allen wrench for the next step, turn the bolt counter-clockwise to loosen it.
Be careful not to overdo it, you don’t want to unscrew the bolt, just rotating it two or three times would do the trick!
3. The Next Step is to Pull The Brake Cable
Till now you would have successfully loosened both the caliper and the bolt, the next step will require you to pull the brake cable outwards, that should happen easily now!
Once you have successfully pulled the cable out, you need to hold it tightly in one place. You will now see that the front brake pads are tightening on the rim, that is because the cable is also getting tighter. You need to make sure that the pads are tight till there is some resistance when you turn the tire, make sure not to overdo it!
If you tighten the pads too much then the tires will not turn at all and that could lead to problems. Keep on experimenting till you hit that sweet spot.
4. Tighten The Caliper Bolt Again
If you are following the steps correctly till now then you have successfully tightened the brake cable. Not much is left now, you just need to tighten the caliper’s bolt again. You turned the bolt counter-clockwise before, now you need to turn it clockwise and do it two to three times, do it till there is no turning the bolt again, this will mean that the bolt has been successfully tightened.
5. Tighten The Barrel Adjuster Again
Now you need to go to the start all over again and tighten the barrel adjuster. Turn the adjuster clockwise to tighten them. You will see that as you are tightening the barrel adjuster, the brake pads have loosed slightly, this means that you are good to go now.
The brake cables will be fully set once the barrel adjuster has been tightened. You can test the brake cables and their tightness by pressing the lever now.
There you have it, you have mastered the technique of both aligning and tightening the bike brakes.
Read More Bike Maintenance Tips:
- How To Use And Shift Bike Gears
- How To Tune Up A Bike
- How to Remove Rust From Bike
- How To Tighten Bike Brakes
- How To Tighten A Bike Chain
FAQs
Can brakes be misaligned?
Yes, brakes can be misaligned.
Do brakes self-adjust?
Yes, there are some brakes that can self-adjust.
Can brakes be installed wrong?
Yes, brakes can be installed wrong.
Is pad slapping bad?
Yes, pad slapping is bad because it can affect the braking efficiency and compromise the brake components.
Recap
Adjusting the bike brakes is a very delicate process but it is also very necessary, they make sure that you have the necessary stopping power when needed. The whole procedure will differ a bit when you are dealing with caliper brakes but don’t worry about that, it won’t be that different.
In this guide, I focused on brakes alignment and how to tighten them. I hope that through this guide you can now fix the brakes yourself without making a stop at the local bike shop. If you have any queries then do reach out to me in the comments below!
Should you have any questions or require further clarification on the topic, please feel free to connect with our expert author Luke Ameen by leaving a comment below. We value your engagement and are here to assist you.



1 thought on “How To Tighten and Align Brakes on Bike”
The only thing you need to tighten and loosen bike brakes is an Allen wrench. The tool will help you tighten or loosen the brake. It is an important instrument when you want to fix the brakes on a bike.