Anyone who has even been on a bicycle is well aware of the fact that once in their life, they will have to change their bike tires for the first time. And you know changing tires can quickly turn into a nightmare if not done properly.
You can easily fix a punctured tire, put on a new patch, or just reinflate it and you’re good as new. The difficulty arises when a puncture is beyond fixation, or your tire has clear signs of wear and tear. The visible cracks appearing in the tire indicate that it’s time to bid farewell to your old tires and get new ones.
How To Install New Bike Tires
Don’t worry, by following some simple steps and using the right tools, you can easily change the tires of your bike. Before getting started, you first need to learn how to remove your old tires.
Required Tools

Let’s start with the tools that you will need to change the wheel of your bike.
All you need:
- A wench
- Tire Levers
- Spare tube of the correct size
- A bike pump (Manual or electric)
Step 1: Remove Your Old Wheel
| Step | Description |
|---|---|
| Rest Your Bike | Place the bike on its handlebars, either on its side, upside-down, wall-mounted, or using an upright bike stand. |
| Adjust The Gears | Set the gears to the smallest ring (outer gear) if removing the front tire. |
| Removing the Quick-Lever/Wheel-Nut | Loosen and remove the quick lever or wheel nut. Use the bike’s manual or manufacturer’s instructions. |
| Use A Wrench | If no quick lever, use a 15mm wrench to loosen the nut. Apply WD-40 or cooking spray if it’s stuck. |
| Unfasten the Brake Cables | Release brake cables by squeezing calipers near the tire. Refer to the manual for specific instructions. |
| Raise The Wheel | Lift the wheel out of the forked slot once the nut and brake cables are unfastened. Remove the chain for the rear tire. |
| Deflate Your Tire | Use a wrench to release air based on the valve type: Schrader, Presta, or Dunlop. |
| Removing the Deflated tire | Use a tire lever to create space and separate the tire from the rim. Repeat the process around the tire circumference. |
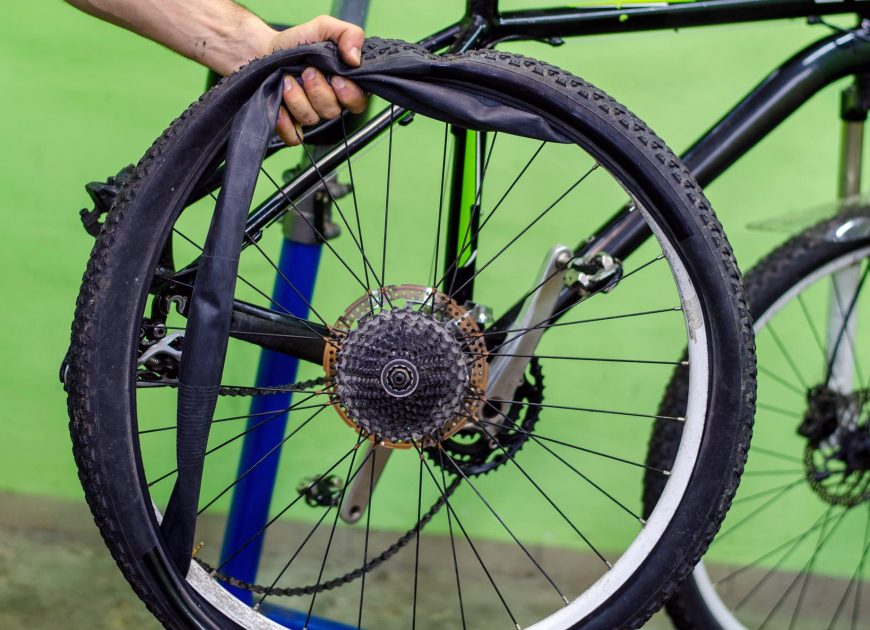
| Pull The Tube | Pull out the inner tube gently. Dump the tube and replace if necessary. |
Now that you have successfully removed the tire, let’s move on to how to attach the new one. Keep following these simple steps and you’ll be done with it soon.
Step 2. Unpack The New Tire Tube
The first step is to unpack your new tire tube. Carefully unbox the item by
- Removing the dust cap
- Removing the lock ring
- Removing the valve cover
Make sure to check for any premature damages. Keep the small parts in a box or a drawer so that you do not lose them.

Step 3. Inflate The Tire Tube
Now that you have successfully unpacked it, it’s time to fill up your new tire tube with air. For this purpose, you can use a bike pump or a tire inflator, whatever suits you best. It is important to inflate the tire tube to avoid any damage that may be caused by bending, pinching, or while you are twisting the tube to fix it. Also, it will be much easier to install the new tire tube if you have already inflated it.
Inflating tubeless tires can be tricky, but our guide makes it easy. Learn how to inflate your tubeless tires quickly and safely with our step-by-step instructions
Step 4. Examine The Tire
Before you begin to install your new tire tube, make sure to examine the condition of your tire. Make sure to look for
- Any internal or external damage
- Critical wear and tear
- Look for any sharp small objects that may cause damage to the tire tube.
If your tire is in good condition, you’re good to go, but if you find yourself checking all the boxes mentioned above, it’s time to get a new tire. Make sure that you always change both tires, if you opt for changing only one, it may lead to various issues. The tires will not match and there will be a risk of exhausting one tire involved. Most probably the older one.
Step 5. Install The New Tire Tube
Now that you know the condition of your tire, it’s time to install your new tire tube in the tire. Use your fingers to press the tube inside the tire. Make sure that your tube is following the shape of the tire when inserting. Watch out for any bending or twisting.
If you are facing trouble while inserting the tube, take out the tube, let out some of the air, and then try again. Letting out some of the air will help the tube to hold its shape.
Step 6. Reinstalling The Wheel
Look for an arrow on your tire, called “Direction of travel”. This arrow tells us about the direction the treads should be facing. Make sure that the arrow is facing in the forward direction. Some tires don’t have this arrow, meaning that they can go either way, so make sure to check for the arrow first. No matter whether your tire is old or new, you will need to follow the same process to put the wheel back on the wheel frame.
If you’re wondering whether your bike tires have a direction, the answer is yes! Check out our guide to learn how to tell which way your bike tires should be facing and why it matters.
Avoid using any tools at this step because they can cause damage to your tire tube. Your fingers are your best friend here.
Using your fingers, follow the steps mentioned
- First, you need to put the air valve inside the air valve hole.
- Adjust the outer rim with the wheel’s one side.
- Now carefully press the rim back in its place alongside the wheel frame.
After you have done this, you will need to fit the other side of the wheel.
- Double-check to see that the tube is correctly placed inside the wheel.
- Place your fingers on any one side of the air valve and start pressing the wheel in its place.
- Slowly press on and push the tire back into its frame and finish this process on the sir valve, from where you started.
- At this point, when the tire is back on the frame, the air valve will be the most loose-fitted.
Tip: It is important to check for any bumps in the tire. If so, it means that your tire tube is twisted or strained. Avoid using tire levers for this step.
Step. 7 Bolt The Lock Ring
If your bike doesn’t have one, you can skip this step. However, if you see a lock ring you need to fasten it. A lock ring is basically on the tube and it goes down over the air valve. The purpose of this lock ring is to hold your tube in its place. You will need to
- Line up your lock ring with the threads of your air valve.
- Now fasten the screw making sure it is screwed down properly.
Step 8. Pump-Up The Tire
After you’ve dealt with the lock ring, it is time to fill up your tire so that the pressure and air levels are correct. The correct level of pressure should be available in the manual or you can find it from the tire wall. You can either use a manual pump or get the deed done using an electric pump. Simply
- Attach your pump to the air valve.
- Start filling up the tire.
- Once you have reached the correct air level, lock up the valve using the cap of the air valve
Related: How To Use A Bike Pump
Step 9. Attaching The Wheel Back on The Bike
Don’t give up because you are almost there. After your wheel is all set, it is time to place it back in its place on the bike. When reinstalling the back tire, make sure to remove the chain out of your way first. Carefully lift your chain and put the tire back in. You will need to
- Carefully place the wheel back in the forked slots.
- Slip the metal bar or the lever. This will hold the tire in its place.
- Use a wrench to tighten the easy lever or the nuts. Make sure that you tighten it up nicely.
- If your bike has an easy-release lever, close it.
After you have installed the wheel, spin it using your hand to see if it is moving freely.
Don’t let a flat tire ruin your ride. Check out our guide on how to fix a bicycle tire that won’t inflate.
Explore our guide on how long do bike tires last for valuable insights.
Step 10. Rejoin The Brakes
If your wheel is spinning freely, it is time to reconnect the brakes if they are still disconnected. After you have rejoined the brakes, make sure to double-check if they are working before taking your bike out for a ride. To reconnect the brakes, simply
- Squeeze the calipers so the brakes slip back in place.
- Now press the brakes so that they are grasping the wheel tightly.
Related: How To Easily Adjust Your Bike’s Brakes
FAQs
Can you replace a bike tire yourself?
Yes, you can replace a bike tire yourself
Do new bike tires lose air?
Yes, new bike tires can lose air.
How do I know if my bike tire needs air?
Use a pressure gauge to check your tire’s pressure. If it is lower than the recommended level, you need to inflate it.
What does PSI stand for?
PSI stands for Pounds per square inch.
Do tubeless tyres need air?
Yes, tubeless tires need air.
Conclusion
Although maintaining your bike may look like a hectic task, it will improve your bike’s life. While replacing the wheel, make sure to store the little parts properly so that you don’t lose them. Also using the correct tools will save you a lot of time. One tip I always share is to frequently check your tire condition. This can help you keep track and also help avoid any big expense that may arise due to an improperly functioning wheel.
If you have any other confusion, reach out to me in the comment section!
Also Read
- Best Hybrid Bikes For Women: Find Top Brands Reviewed And Ranked
- Why Do Bike Tires Keep Losing Air? Pressure Loss Explained!
- My Bike Tire Keeps Popping – 7 Common Causes And Solutions!
- 5 Best Winter Bike Tires – Studded Tires For Snow And Ice
- 10 Best Bike Tubes- Inner Tubes To Choose From
- Bike Tires: A Buyers’ Guide On Clinchers Vs. Tubular Vs. Tubeless Tires
Should you have any questions or require further clarification on the topic, please feel free to connect with our expert author Luke Ameen by leaving a comment below. We value your engagement and are here to assist you.


1 thought on “How To Install New Bike Tires In 10 Easy Steps!”
Thanks for the great article. These tips helped me a lot to put tires back on my bike. Do you have any advice about pressure when pumping up the tire?